
Content Assistant Tutorial
By Dan Published Updated 4 min read

Quick answer
Content Assistant helps you write articles that match what ranks on Google. Create an article for your keyword, then use the sidebar: Overview for keyword stats and word and link targets, Keywords for terms to cover, Questions to answer, SERP for top results, and Meta for SEO settings.
Key takeaways
- Pick your keyword with keyword research first, then open Content Assistant to write.
- Aim for a word count and link count close to the targets from the top results.
- Cover as many of the suggested keywords as fit naturally; used ones turn green.
- Answer popular questions to win long-tail traffic and featured snippets.
- Set your meta title, description and social preview in the Meta tab.
For all of you bloggers and article writers out there we are happy to introduce a new tool in our feature set called Content Assistant!
Content Assistant is not your typical on-page SEO optimization tool. Most of your usual tools (for example Yoast) are there to help you with things like optimizing meta descriptions, page titles, headings, etc… Content Assistant is different. The main goal of Content Assistant is to help you maximize the ranking and traffic potential of the target topic.
Rather than concentrating on the technical SEO aspects of our article, Content Assistant helps us break down what type of content Google is looking for within the top page results and allows us to get the most out of each article we create.
It is also not meant to replace the normal keyword research functions. Content Assistant should be loaded up after you’ve already figured out which keyword and topic you’ll be writing about.
Content Assistant In Action
In 2018 we decided to release our Brainstorm Tool for free (today it’s our free Niche Finder). We created a landing page for it targeting the overall topic “niche ideas.” We put together a landing page that we thought was competitive for a first-page result. Our page hovered around the 4th and 5th page of Google for weeks.
On Sept. 4th, 2018 we decided to use the page as a case study for Content Assistant. We optimized our landing page content as per the “Must Words” and “Recommended Keywords” suggested by Content Assistant. We increased the word count to be more competitive with the top page results. We also used the “Content Snippets” and “Questions” for quick research. After Google re-crawled the page our rankings immediately went up to 27th and then a few days later had gone up to #14!

*Update*: By 2022, this page had ranked on the 1st page of Google for 4 years.
We hadn’t created any other backlinks (the internal link seen above was created after the rankings update to further try and help rankings).
Now we are not guaranteeing these sorts of results for everyone and there could be some other factors at play here as well. Without a doubt though Content Assistant helped. This is not the only page of ours where we’ve seen gains after using Content Assistant but for the sake of keeping things brief, we are only including this particular page as an example.
Getting Started With Content Assistant
Update: Content Assistant has been rebuilt since this post was first published in 2018. The steps below describe the current version; the video shows the original design.
Open Content Assistant and create a new article. Choose “Blank Article” to write it yourself, or “Generate with AI” to have the AI draft it for you. Enter your main keyword phrase and a title.
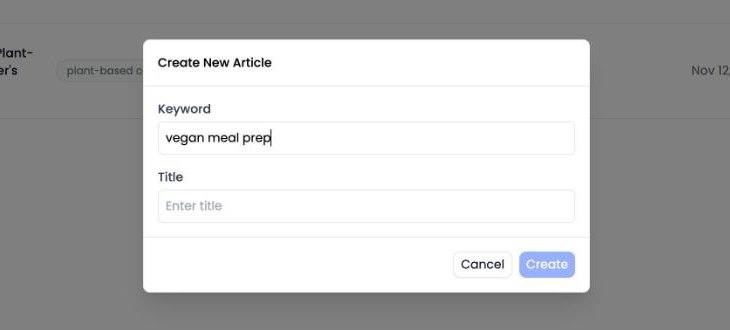
Content Assistant will load all of the relevant data for your keyword. You’ll see the text editor for your article, plus a right-hand sidebar with these tabs:
- Overview
- Keywords
- Questions
- SERP
- Meta
Overview Tab
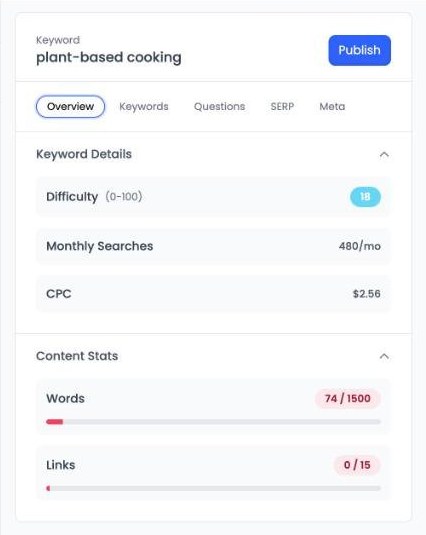
The Overview tab gives you the stats for your article. Keyword Details shows the monthly searches, CPC and keyword difficulty (0-100) for your keyword.
Content Stats
Content Stats compares your article’s word count and number of links to targets based on the top Google results. The goal is to get your article close to or above those targets.
Keywords Tab
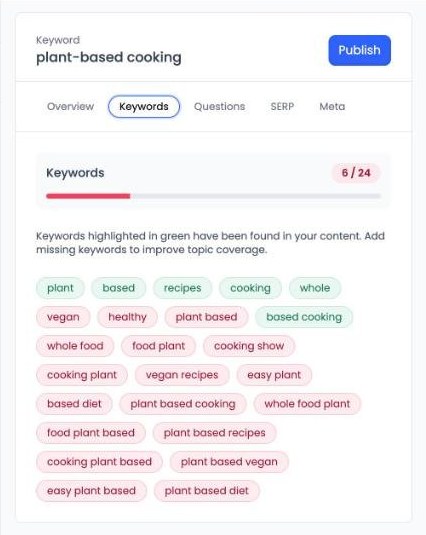
The Keywords tab lists the keywords and phrases the top-ranking pages use for your topic. As you write, any keyword you use turns green, and the meter at the top shows how many you’ve covered.
By including as many of these keywords as fit naturally, you are making sure your article covers the overall theme of the topic and in turn giving Google what it’s looking for in a first page result for this keyword phrase. Don’t force in keywords that don’t fit; use them as a guide.
Questions Tab
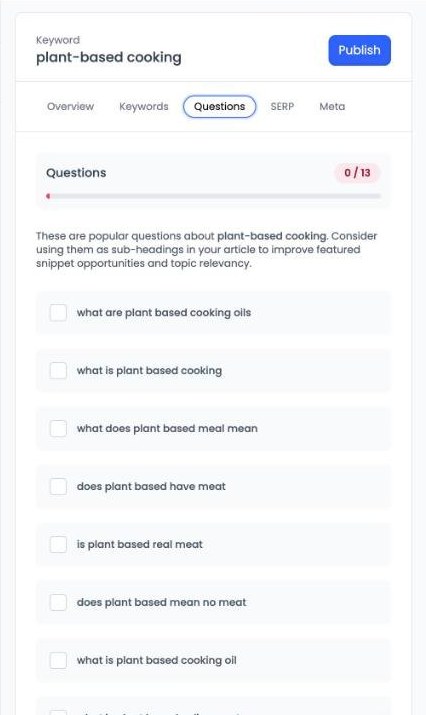
These are popular questions people ask about your topic. Some might be good sub-headings for your article. Including a few of them may help you gain featured snippets and overall topic relevancy. You can tick off each question once your article answers it.
Adding questions and answers in your articles is a great way to grab a lot more long-tail traffic and Google loves ranking pages that answer questions directly.
SERP Tab
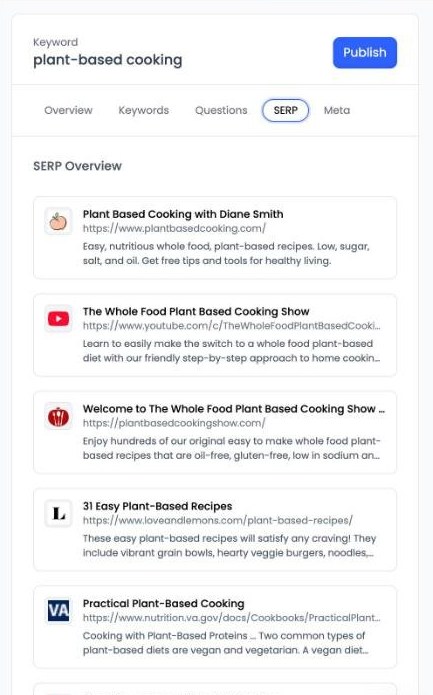
Here is where you can see an overview of the first page Google results for your keyword. Click any result to open it in a new tab. This gives you a nice quick view of the top results as a reference.
Meta Tab
The Meta tab is where you set your meta title, meta description, canonical URL, index and follow settings, and the title and description used when your article is shared on social media. It also has options for publishing to WordPress.
Final Thoughts
Content Assistant is not meant to replace your normal blogging tools. For me I like to write my article as normal, then copy the text into Content Assistant and build from there. Some of you may prefer to start your articles within Content Assistant. Either way, we highly recommend running your articles through to ensure you are maximizing their full SEO potential!
Content Assistant Video Overview
This video gives a quick walk-through of the features discussed in this article.
