Staying organized can be daunting as the keyword research process moves along. You can easily start sifting through thousands of keywords, some winners, some losers, and forget what’s what. Although we do offer many export options that can help with this, one of the best ways to avoid your research becoming a complete disorganized mess is by taking advantage of the Lists features within Keysearch.
Getting Started With Lists
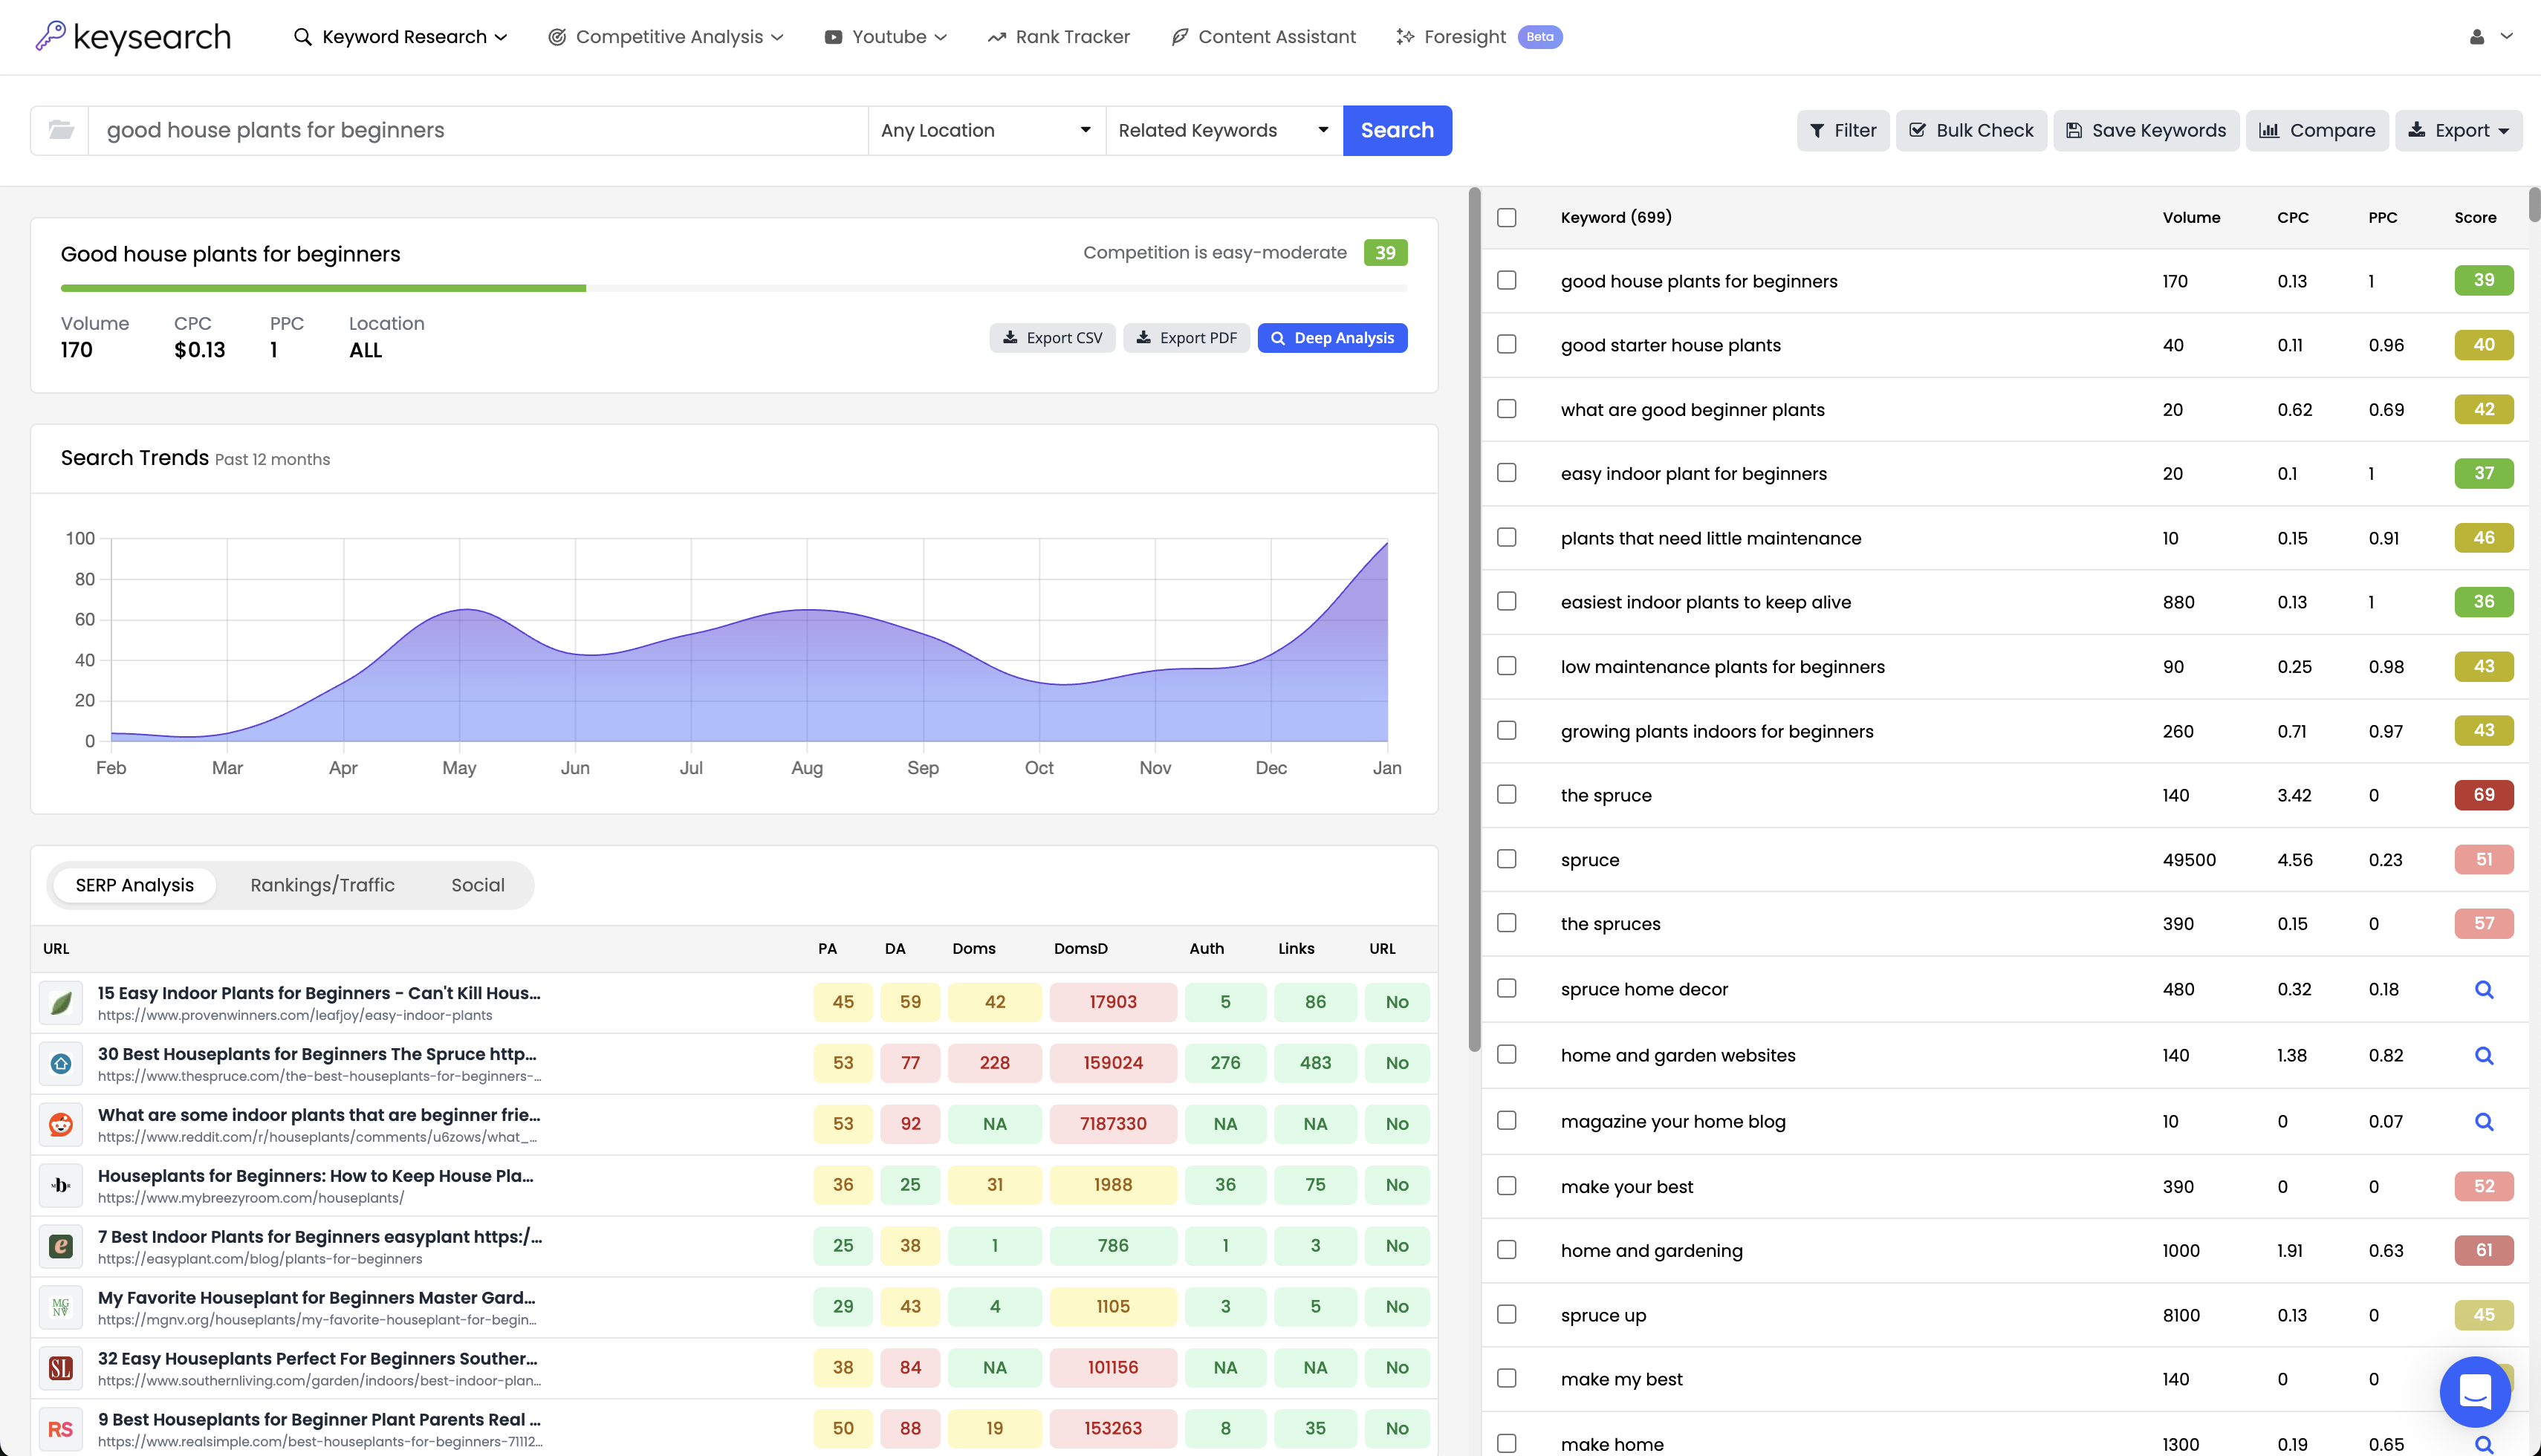
When you are on the Research page you’ll see a button above the keyword table titled “Save Keywords”. This is where you can create new lists or save to already created lists on the fly while in the midst of doing your keyword research. In order to save keywords to a list you just need to select which keywords you’d like to save by clicking the checkboxes next to the keyword. If you’d like to save all of the keywords in the table you can use the select all box at the top of the keyword table.

Once you’ve selected the keywords you’d like to save, click the “Save Keywords” button which will bring up a popup window. In this window, you can either “Add to a new list” which will save the selected keywords to a brand new list, or select one of the previously created lists to save the selected keywords. If you choose “Add to a new list” you will be prompted to name the list. Once named, hit the “Add to list” button, and voila! Your keywords are now saved to a list.
Navigating the My Lists Page
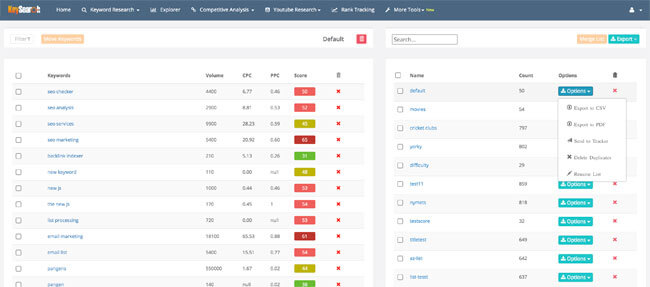
The “My Lists” page is where you can access your already created lists and do some further organizing if you’d like. You have the option to view all of the lists, see the keyword scores/keyword data, delete keywords from the lists, and move the keywords around to different lists.
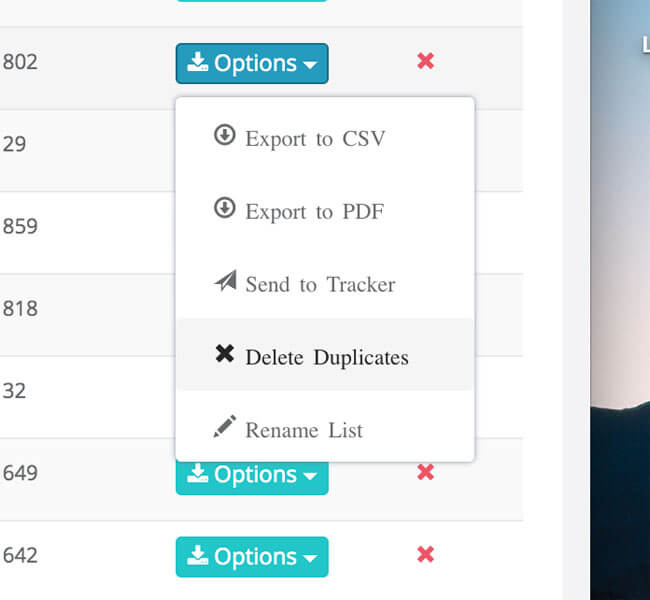
The left-hand table shows you the list of keywords in the currently selected list. You can flip through your lists by clicking on the lists in the right-hand table. This will then show the corresponding keywords for that list in the left-hand table. The right-hand table also allows you to see how many keywords are in each list along with export options, the ability to rename the list, send the keywords to the rank tracker, delete potential duplicate keywords within the list or delete the list entirely. Above the right-hand table is also the ability to search your lists, more export options, and the option to merge your lists together.
Moving Keywords
If you’d like to Move Keywords to a different list, just select the checkbox next to the keywords you want to move, click the “Move Keywords” button and a popup will appear. Then select the list you’d like to move the keywords to. You will then be asked whether you want to move the keywords and delete them from the current list, or move and keep them in both lists. Once you choose which option you’d like, the keywords will be moved.
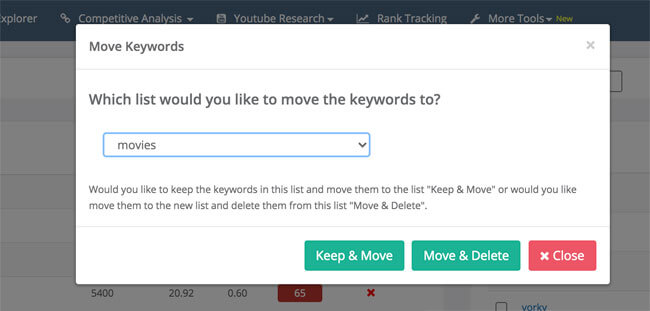
This allows you to organize your lists in whatever way you’d like. Since you can always move keywords around different lists you don’t need to worry about organizing them while you are deep in the keyword research process. You can organize later so you don’t break your flow.
Merging Lists
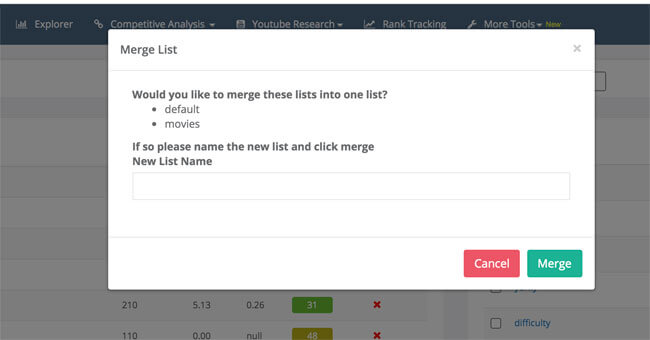
Merging lists allow you to combine entire lists together. Just select the checkboxes next to the lists you’d like to merge and you will be prompted to name the new merged list. Keep in mind when merging lists, the old lists will be deleted leaving just the new merged list.
Delete Duplicates
The “Delete Duplicates” option checks your lists for any duplicate keywords. It will then clean the duplicates leaving just one copy of the keyword. This comes in handy since many times users create lists around a certain topic. During the keyword research process, you may search similar phrases, saving big lists of keywords to one main list, not realizing that the same keyword has been put in the list multiple times.
Send To Tracker
This option can be very handy. Let’s say you’ve found a few hidden gem keywords and want to start tracking your rankings for these keywords. The “Send To Tracker” feature allows you to automatically add these keywords to the Rank Tracker right from the My Lists page. Just select which keywords you want to start tracking, which location you’d like them to be tracked in and the URL you want to be tracked. The keywords selected will then automatically be added to your Rank Tracker.
Keeping Organized With Lists
When first starting out with Keysearch it may not seem that you’ll need to utilize the lists feature but you may quickly realize that exporting many different files, remembering which keywords you liked and didn’t like, etc… can become a big hassle. The lists feature makes this all super easy and puts all the tools needed in one centralized place. The export options available through creating lists also allow you to export the data in a more organized fashion than you might get by exporting directly from the Research page.
Make sure to check out other Keysearch tutorials on the Keysearch Tutorial page!
- How to Do Keyword Research for Free: Best Free Keyword Research Tools in 2024 - December 13, 2024
- Benefits of Keyword Clustering: Why is it Important to Group Relevant Keywords Together? - December 13, 2024
- What is Keyword Density in SEO and Its Importance - December 13, 2024


